Here's a short list of ideas for the further development of the HamsterBot. Currently, the robot can react to the mouse correctly, and has fairly good MCL mapping abilities, courtesy of the directional bump sensor. Unfortunately it is a very jerky platform, and it doesn't use all the sensors avaliable to the robot in its MCL model. Goals for the remaining part of the semester, include:
- Smoothing acceleration
- Setting minimum and maximum allowable velocity
- Including cliff sensor data in the MCL model
- Replacing the hamsterball (the old one had to be returned)
For now, these seem to be a good start. If these are accomplished quickly, there's always the idea of adding an offboard camera to track the roomba's progress, and perhaps even automatically generate the map used for MCL.
More media will be available shortly once the hamsterball is replaced and I can try more test runs.
Showing posts with label progress. Show all posts
Showing posts with label progress. Show all posts
Tuesday, April 10, 2007
Friday, March 9, 2007
Monte Carlo Localization!
In robotics, localization is the task of determining one's location within a known environment, given available sensory data. Theoretically, if a robot knows its starting position and how many times its wheels have rotated, it should be able to calculate its resulting position on a map. Unfortuneately, due to real-world factors like wheel slippage, there is a significant amount of uncertainty in this odometric data, so a robot needs to gather and reason about other sensory information in order to keep better track of its own position.
With HamsterBot, we implemented an algorithm called Monte Carlo Localization, or MCL for short, which lets the robot figure out where it is on a map.
You can read the original paper on MCL at this page, or a short description of it at Wikipedia. The general idea of it is to first guess where the robot is. Then when the robot moves, we take each of these guesses, called particles, and move them through the map in roughly the same way that the odometric data indicates, but with small random variations for each particle. Next we compare the current sensor data from the robot to simulated sensor data for each particle, and assign a probability to the particle based on how close the two sensor readings are. See the post on Motion and Sensing Models for more information on how positions and probabilities were assigned. Finally we resample the particles based on their assigned probabilities, so that high probability particles tend to be multiplied and low probability particles tend to die off. Then the process starts over. In this way, we can get what we hope is a good idea of where the robot is within our map.
Currently, Hamsterbot uses just its bump sensor. In the videos of our demo, you can see the robot bumping into walls, and on the screen, all the yellow particles not touching a wall dissapear, because we know they aren't accurate representations, given the bump we just experienced.
Our MCL algorithm in particular has some cool features to keep the robot on track. Should none of our particles correspond to the sensor data from our robot, then we create all new particles, and spread them across the map, hoping one of them will be close to the actual robot. In the future, we are going to also make sure these all new particles match the current sensor data from the robot...if the robot is bumping something, there's no point in creating particles far away from any walls!
This particular algorithm is something that will likely have many upgrades in the near future, but for now, it's the brains of our Hamsterbot!
Check out Video #0 to see the real HamsterBot and a good example of MCL in action. Below is a movie of a simulated Roomba running MCL. The red dot indicates the actual robot position, the blue dot is the odometric data, and the yellow dots are our MCL particles.
Tuesday, March 6, 2007
HamsterBot
HamsterBot 1.0 was successfully demoed today. This post documents the details of our implementation...
Physical Design
Our final robot consists of a hamsterball, a roomba, a styrofoam ring, and a little duct tape. The ring is wrapped in teflon tape and mounted on two "feet" (empty teflon tape containers) which are then duct taped on either side of the cargo bay of the roomba. A motion sensor is then placed in the cargo bay (stabilized by some foam bedding) and the hamsterball is set inside the ring, such that its bottom surface rests on the sensor. The ring and sensor are sufficiently smooth to allow the ball to rotate freely in place in any direction.
Mouse Motion Sensing
Inspired by the video of iRobot's hamsterbot, we chose a wireless optical mouse as our motion sensor. The pyRoomba software used for various class assignments served as a basis for our program. The graphics code included therein utilized the Tkinter module and included functions for determining the cursor position (as long as it is over the canvas). I extended this code to include data members for the cursor position and to update these data members whenever mouse motion was detected.
Our Program
I then added a "Mouse Mode" to the pyRoomba main program where the cursor position is checked at regular intervals. If a change in position occurs, the robot's linear and angular velocities are set to be proportional to the vertical and horizontal displacements, respectively, between the starting and ending points of the movement. Thus, moving the cursor upward via the mouse causes forward motion, while moving it to the left causes the robot to turn toward the left, etc....
This motion model is basically what one would expect in order to steer the roomba with a mouse as one would normally use the mouse (that is, on the table, with the sensor facing down). Within Mouse Mode, we can also toggle on and off "Hamster Mode". Since the mouse sits upside down, with the hamsterball "rolling" in place over the sensor, this switch simply flips the sign of the angular velocity used. i.e., If it looks like the mouse is moving left under hamsterball control, the ball must actually be rolling toward the right, so we turn towards the right.
The ctypes python module provides a function that will set the position of the cursor to any point on the screen, which ensured that we would not "run out of screen" as described in the previous post, since we can just place the cursor back in the center of the screen after each motion sampling.
Future Work
There are still a couple issues that could be improved upon with this system. The first is that the hardware could be nicer. The styrofoam ring is not very durable and doesn't always keep the ball centered over the mouse sensor. It also allows the ball (and thus, the cursor) to wobble back a forth slightly due to changes in velocity, which is a kind of motion that it would be nice to ignore, if not eliminate.
Secondly, the robot's motions resulting from mouse movements are somewhat jerky. Part of this is due to the ball wobbling in the ring as described above, but a human hand can create the same effect. If the mouse or ball is moved quickly forward and back, the robot's linear velocity will change direction so abruptly that it will pop a wheely! This looks cool to an observer, but would probably not be very fun for a hamster. Thus, our motions could definitely use some smoothing. Forcing each sampled motion to run for a minimum time, or causing changes in velocity to occur more gradually are two possible approaches to this end.
Wednesday, February 7, 2007
Programs, Python and Photographs

Today Lilia and I successfully wrote a simulator for our dear Roomba which navigates a small room and seeks out a goal. This program is written in Python and runs on my laptop, which communicates the proper movements to the Roomba via a Bluetooth radio, which is the chip seen in the picture.
Indeed, we tried to test this program out on our Roomba. Unfortunately, we discovered that Roombas tend to not work so well when you don't have them charged. As a result, the only video of our progress so far is this one. Just wait, better things will come very soon!
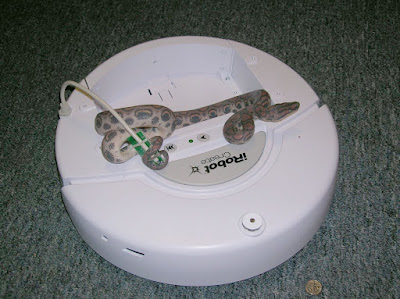
Until we get some cool videos up, you will have to be content with the ever-fearsome, Snakes on Roombas!
Friday, February 2, 2007
Remote Control Roomba
Today we got the pyRoomba python code working on Scott's laptop. We also obtained a bluetooth radio for our roomba so that it can be controlled remotely through python scripts or the command prompt.
Our next objective is to capture some images and/or video of the roomba in action. We are also trying to think of an alternate name for our roomba, to distinguish it from other roombas...
We will also start working on the next step towards Hamsterbot: writing Python code to capture wireless optical mouse data and convert it into pyRoomba commands.
Wednesday, January 31, 2007
Up and Running
After several downloads and more than a few pages of manuals, the Roomba Create has successfully run a simple program and been connected to a computer!
Courtesy of the Create manuals page, we were able to download tools which allow us to write basic programs in C, compile them, and then transfer this compiled code over to the Roomba.
So far, deciphering the example code has proven to be tricky, but soon enough of it will be understood to create a sample program. The goals of this sample program will be testing the Roomba's mobility and sensor outputs.
Friday, January 26, 2007
Progress Report #0
Today we received our Create and various accessories including the command module, remote, and battery pack. Unfortuneately, the battery was not yet charged, so further progress will have to wait.
Subscribe to:
Comments (Atom)