HamsterBot 1.0 was successfully demoed today. This post documents the details of our implementation...
Physical Design
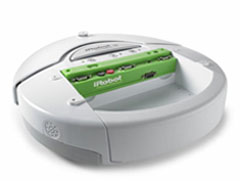
Our final robot consists of a hamsterball, a roomba, a styrofoam ring, and a little duct tape. The ring is wrapped in teflon tape and mounted on two "feet" (empty teflon tape containers) which are then duct taped on either side of the cargo bay of the roomba. A motion sensor is then placed in the cargo bay (stabilized by some foam bedding) and the hamsterball is set inside the ring, such that its bottom surface rests on the sensor. The ring and sensor are sufficiently smooth to allow the ball to rotate freely in place in any direction.
Mouse Motion Sensing
Inspired by the video of iRobot's hamsterbot, we chose a wireless optical mouse as our motion sensor. The pyRoomba software used for various class assignments served as a basis for our program. The graphics code included therein utilized the Tkinter module and included functions for determining the cursor position (as long as it is over the canvas). I extended this code to include data members for the cursor position and to update these data members whenever mouse motion was detected.
Our Program
I then added a "Mouse Mode" to the pyRoomba main program where the cursor position is checked at regular intervals. If a change in position occurs, the robot's linear and angular velocities are set to be proportional to the vertical and horizontal displacements, respectively, between the starting and ending points of the movement. Thus, moving the cursor upward via the mouse causes forward motion, while moving it to the left causes the robot to turn toward the left, etc....
This motion model is basically what one would expect in order to steer the roomba with a mouse as one would normally use the mouse (that is, on the table, with the sensor facing down). Within Mouse Mode, we can also toggle on and off "Hamster Mode". Since the mouse sits upside down, with the hamsterball "rolling" in place over the sensor, this switch simply flips the sign of the angular velocity used. i.e., If it looks like the mouse is moving left under hamsterball control, the ball must actually be rolling toward the right, so we turn towards the right.
The ctypes python module provides a function that will set the position of the cursor to any point on the screen, which ensured that we would not "run out of screen" as described in the previous post, since we can just place the cursor back in the center of the screen after each motion sampling.
Future Work
There are still a couple issues that could be improved upon with this system. The first is that the hardware could be nicer. The styrofoam ring is not very durable and doesn't always keep the ball centered over the mouse sensor. It also allows the ball (and thus, the cursor) to wobble back a forth slightly due to changes in velocity, which is a kind of motion that it would be nice to ignore, if not eliminate.
Secondly, the robot's motions resulting from mouse movements are somewhat jerky. Part of this is due to the ball wobbling in the ring as described above, but a human hand can create the same effect. If the mouse or ball is moved quickly forward and back, the robot's linear velocity will change direction so abruptly that it will pop a wheely! This looks cool to an observer, but would probably not be very fun for a hamster. Thus, our motions could definitely use some smoothing. Forcing each sampled motion to run for a minimum time, or causing changes in velocity to occur more gradually are two possible approaches to this end.
Tuesday, March 6, 2007
Subscribe to:
Post Comments (Atom)

No comments:
Post a Comment